First steps with the Serverless Framework
Serverless technologies have become prevalent but they lack some tooling to make them easier to work with. The Serverless Framework comes to the rescue in the form of a CLI that automates deployment tasks. This post will be an introduction to using this tool.

The use case
The content of Ippon’s blog is stored on GitHub and I thought it would be a good idea to compute statistics (e.g. how many blog posts per author, how many blog posts per year, etc.) when the Git repository is updated. I thought we could implement this using AWS Lambda and a Google Spreadsheet:
- on GitHub, we setup a webhook to hit an endpoint on AWS
- on AWS, we setup an endpoint using API Gateway
- API Gateway calls a Lambda function
- the Lambda function calculates the statistics and updates the Spreadsheet.
We already have some Java code that calculates the statistics, and we just need to wrap that code in a Lambda function. The function will need to have access to S3 to read a configuration file, and to SNS to send a notification when done.
Problem is, we can do the setup through the UI but it is tedious and not repeatable. We can use the AWS CLI or a CloudFormation template but this is also tedious. Let’s see how the Serverless Framework can help us.
Prerequesites
Before we start, you will need to install the Serverless CLI. Follow the instructions on the Getting Started page.
Once the Serverless CLI is installed, you will need to define credentials for your Cloud provider. I will be using AWS in this post, but support for Azure, GCP, and some other platforms is also provided. Instructions for AWS can be found here.
Step 1: generating files from a template
The first step is to scaffold the application from a template. We want a Java application built with Gradle, and that we will run on AWS, so we are running serverless create -t aws-java-gradle. The following files are generated:
./serverless.yml
./gradle/wrapper/gradle-wrapper.jar
./gradle/wrapper/gradle-wrapper.properties
./gradlew
./.gitignore
./build.gradle
./gradlew.bat
./src/main/resources/log4j.properties
./src/main/java/com/serverless/Response.java
./src/main/java/com/serverless/Handler.java
./src/main/java/com/serverless/ApiGatewayResponse.java
The most important file is serverless.yml. This file contains all the settings for the Serverless CLI to do its job. We will be modifying this file a lot. Here is its content (I removed the extra comments):
service: aws-java-gradle # NOTE: update this with your service name

provider:
  name: aws
  runtime: java8

package:
  artifact: build/distributions/hello.zip

functions:
  hello:
    handler: com.serverless.Handler
We want to start by changing the name of the service (service: blog-stats), the name of function (replace hello: with process:) and the name of the artifact (artifact: build/distributions/blog-stats.zip). Make sure to update the build.gradle file as well (baseName = "blog-stats").
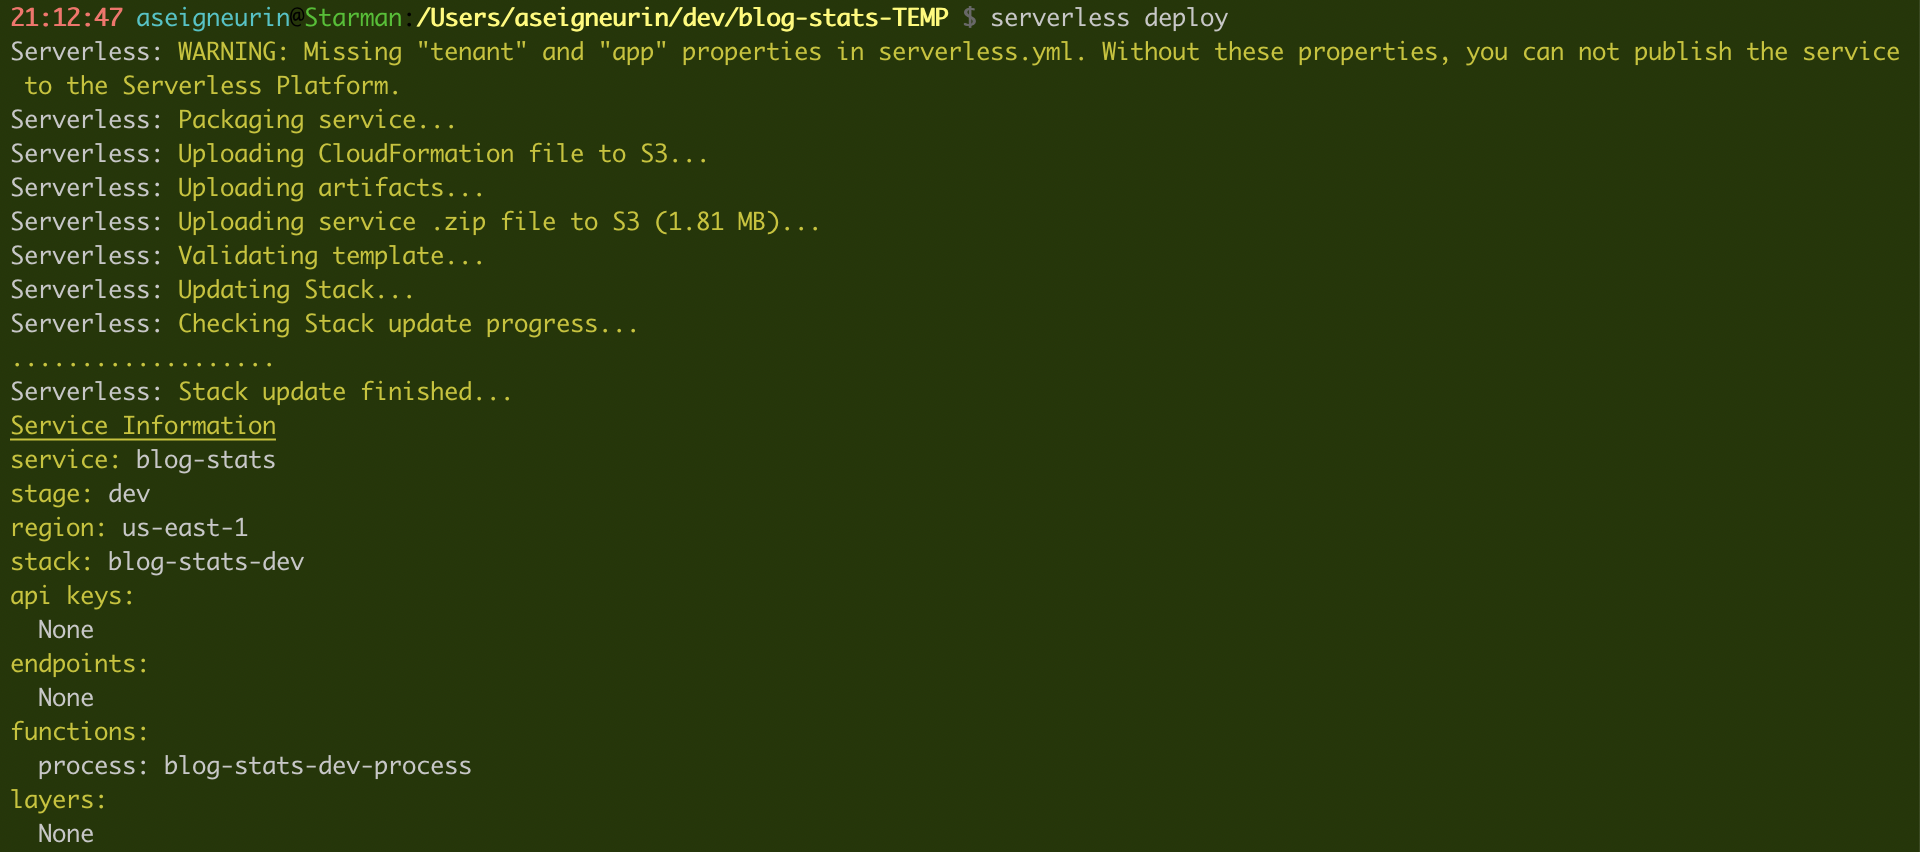
Now, let’s build the code (./gradlew build) and deploy it (serverless deploy):

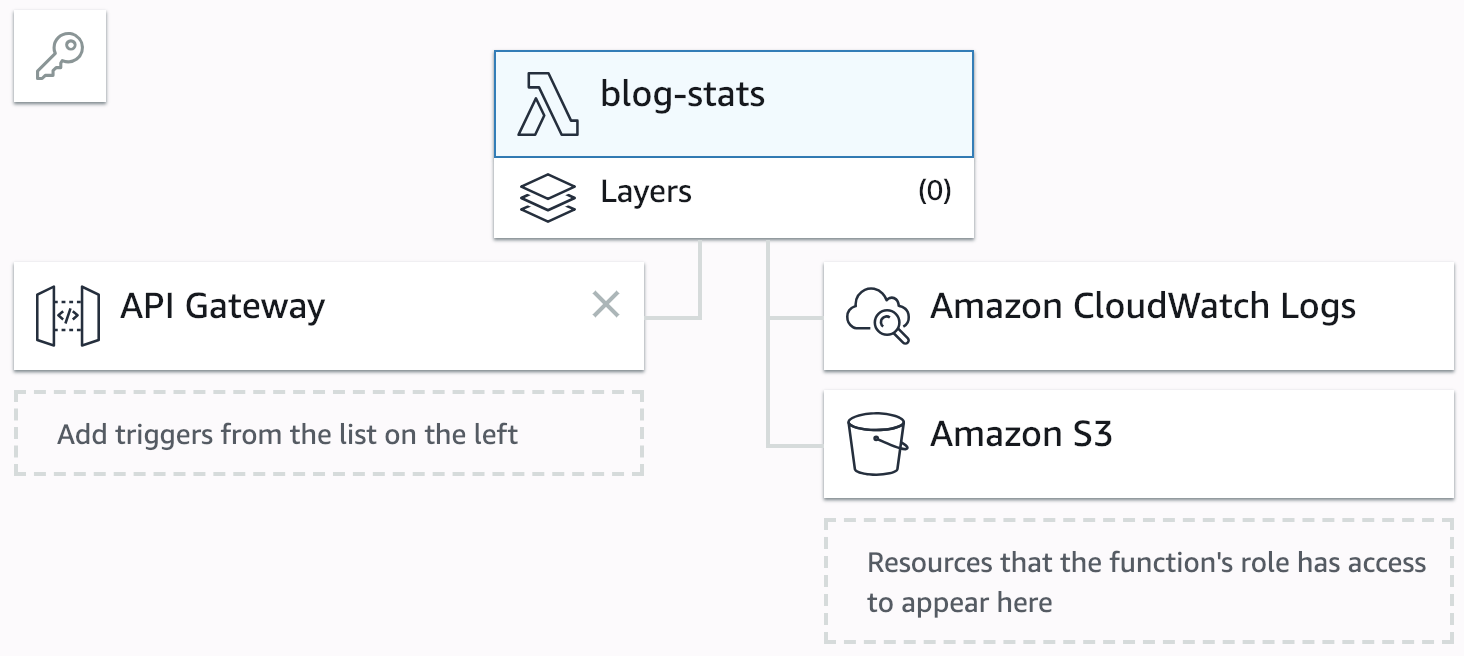
With this command, the artifact produced by Gradle (the zip file) got uploaded to S3, and a CloudFormation template got created and executed. The result is a simple Lambda that we cannot execute yet because it doesn’t have any trigger:

Step 2: adding an API Gateway endpoint
We want to be able to trigger our Lambda function through an API Gateway endpoint. All we need is a URL that, when hit, will run the function. We can modify the serverless.yml file as follows:
functions:
  process:
    handler: tech.ippon.blog.stats.Handler
    events:
    - http:
        path: blog-stats
        method: any
Now, if we run serverless deploy again, the Serverless CLI will smoothly update our stack: an API Gateway endpoint will be created and connected to our Lambda function:

The endpoint URL will be output by the CLI:
endpoints:
  ANY - https://.......execute-api.us-east-1.amazonaws.com/dev/blog-stats
Step 3: granting access to S3 and SNS
I said earlier that our function needs to read a configuration file from S3 and needs to send notifications through SNS. We need to grant permissions to the Lambda function for that. We can do so through the iamRoleStatements element under provider:
provider:
  iamRoleStatements:
    - Effect: "Allow"
      Action:
        - "s3:GetObject"
      Resource:
        - "arn:aws:s3:::blog-usa/*"
    - Effect: "Allow"
      Action:
        - "SNS:Publish"
      Resource:
        - arn:aws:sns:...
We can see the change in Lambda, but most importantly, the IAM role attached to the function was updated to grant the required permissions.

Step 4: defining some environment variables
We now need to define some configuration through environment variables that we will setup in our Lambda function. It turns out these variables are sensitive values, so we might as well externalize them in a secrets.yml file:
sns_topic_arn: "arn:aws:sns:..."
credentials_s3_location: "..."
consultants_spreadsheet_id: "..."
posts_spreadsheet_id: "..."
We can then include this file from our serverless.yml file:
custom: ${file(secrets.yml)}
And we can finally define environment variables which values are read from the secrets:
provider:
  environment:
    TOPIC_ARN: ${self:custom.sns_topic_arn}
    CONSULTANTS_SPREADSHEET_ID: ${self:custom.consultants_spreadsheet_id}
    CREDENTIALS_S3_LOCATION: ${self:custom.credentials_s3_location}
    POSTS_SPREADSHEET_ID: ${self:custom.posts_spreadsheet_id}
Step 5: additional settings
Let’s define a few additional properties: the region where to deploy the code (already us-east-1 by default, but it is safer to specify it explicitly), the amount of memory allocated to the function, and the timeout (6 seconds by default, which is too short in this case). We can also define the “stage” (“dev” by default) if we want to deploy multiple versions of the function.
provider:
  name: aws
  runtime: java8
  region: us-east-1
  memorySize: 512
  timeout: 30
  stage: prod
In practice, I found that the Serverless.yml Reference is a good way to find what properties were available.
Step 6: updating the code, and deploying again and again…
Now, if we update the code of the Java application, we can easily update our stack through a ./gradlew build && serverless deploy command. The Serverless CLI will update the AWS resources in a repeatable fashion, which is great.
When we are done with this function and we want to destroy it, we can simply run serverless remove. All the AWS resources associated with our function will be removed: the IAM role, the temporary S3 bucket, and the Lambda function itself. Smooth.
The dashboard
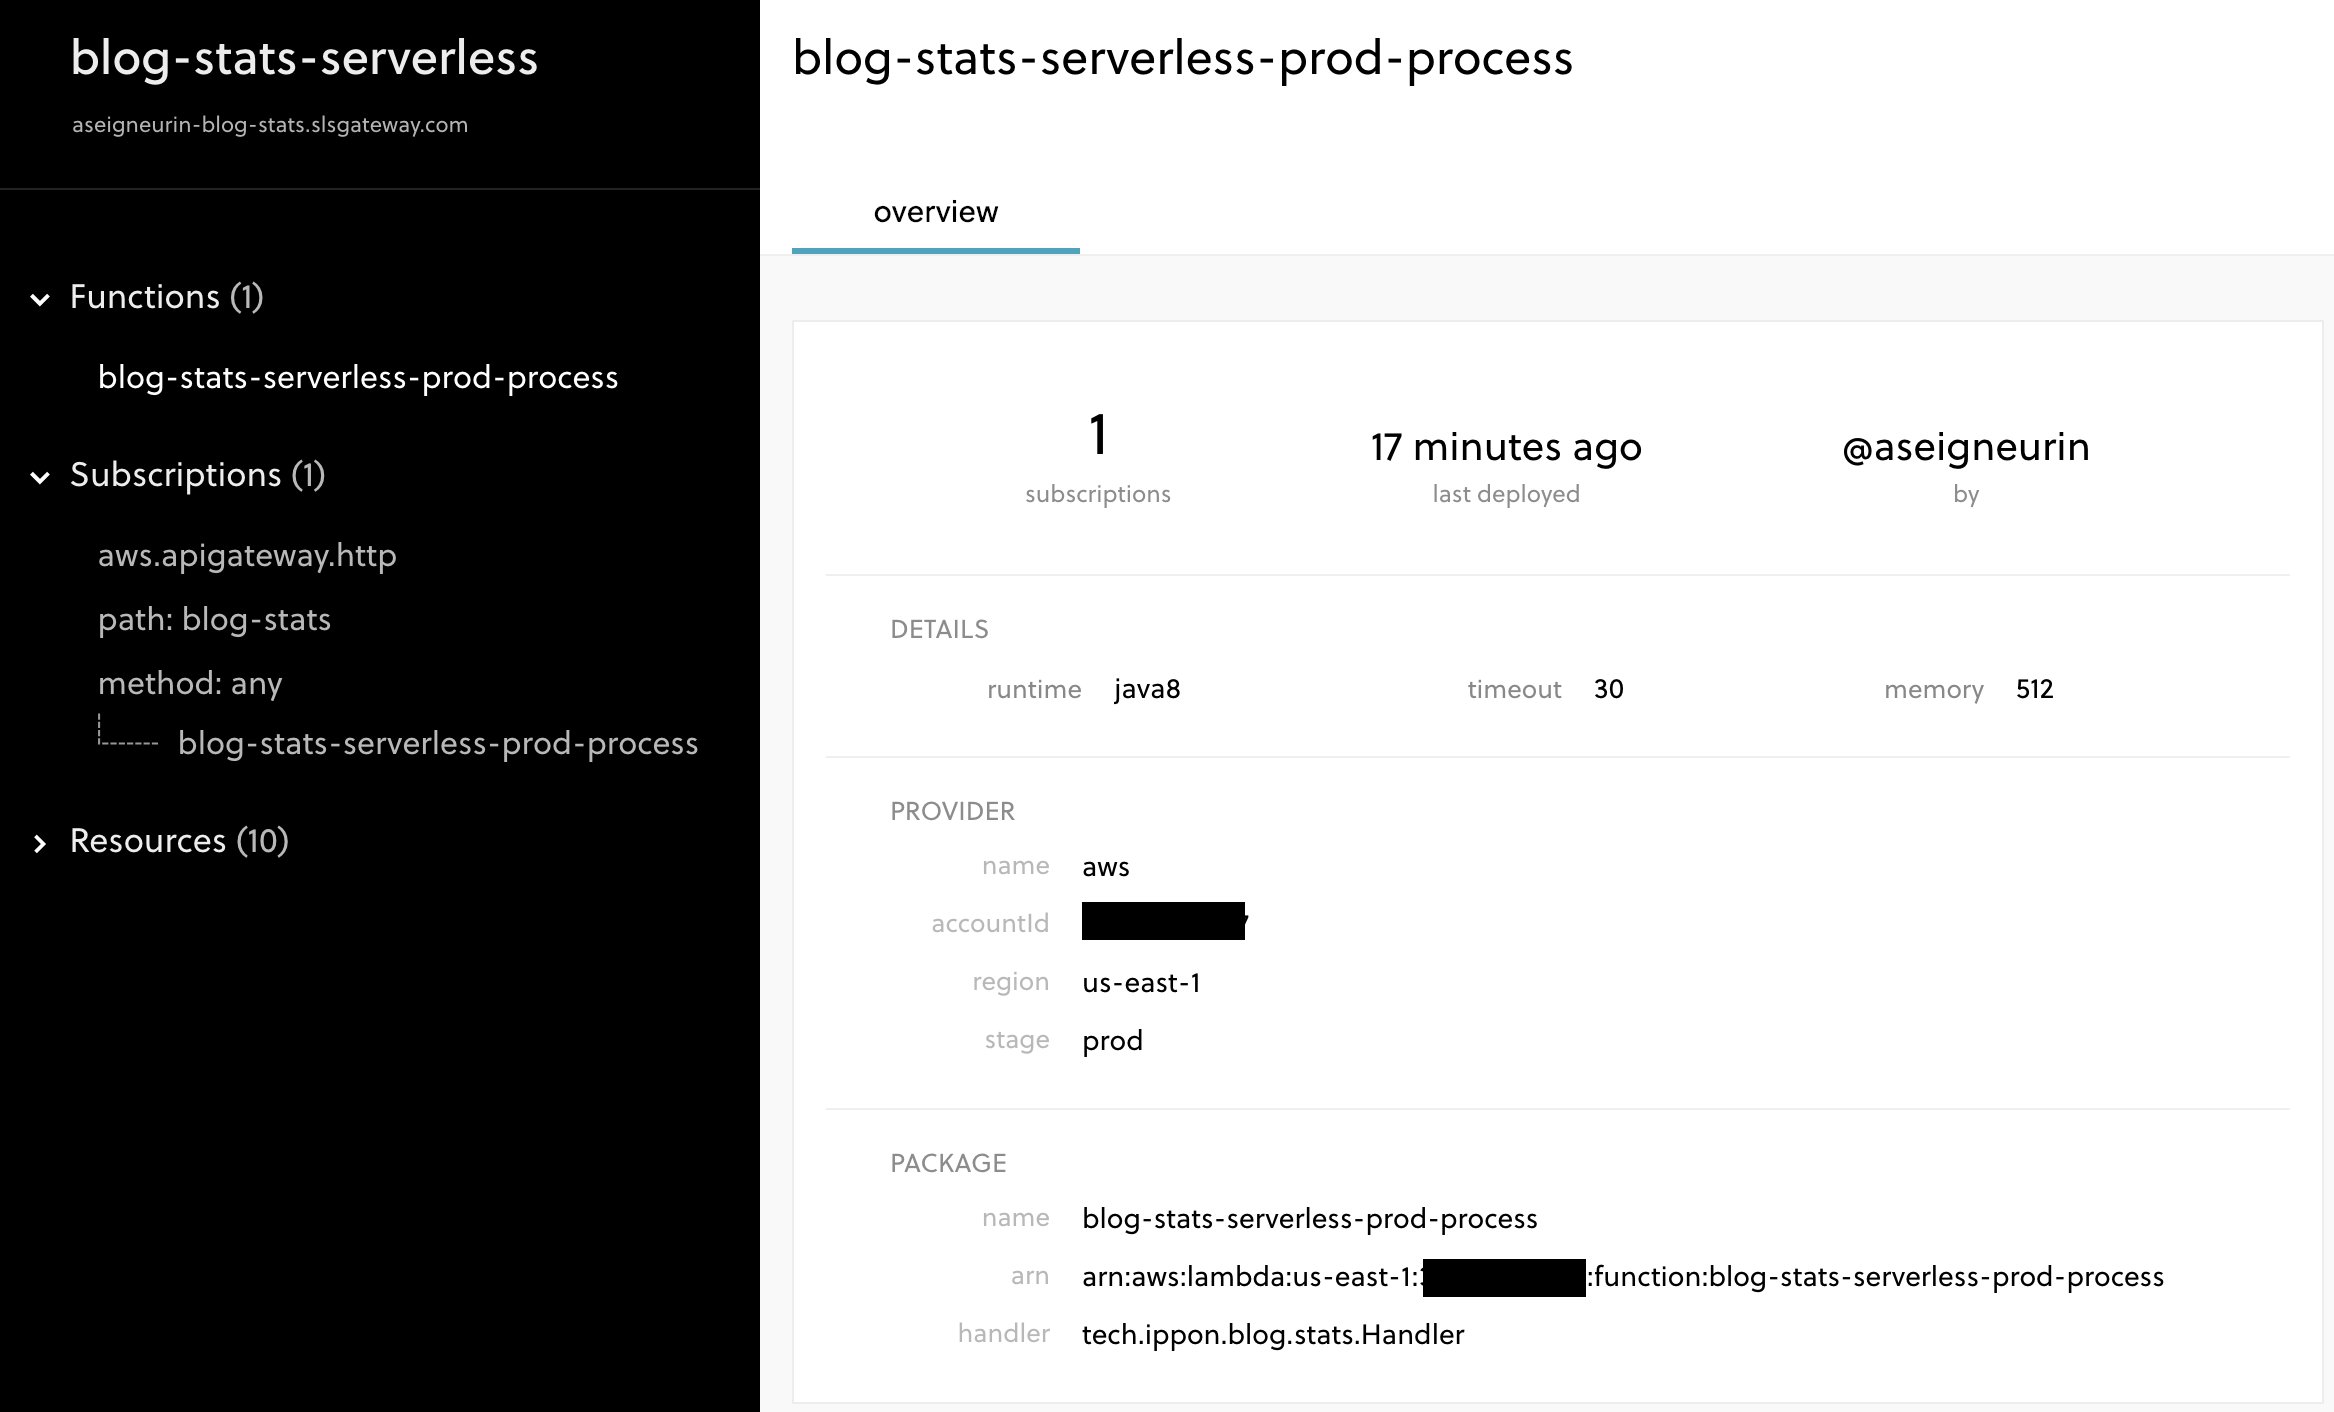
The framework also comes with Serverless Platform which acts as a dashboard to visualize and interact with your stack:

For your application to be registered with this dashboard, you will need to configure the tenant and app properties in your serverless.yml file.
This dashboard is still a bit dry, but it should eventually contain the CloudWatch logs - and maybe more - which would allow you to see everything associated with your stack in a single place. The drawback is that Serverless now has your data on their website…
Conclusion
The Serverless CLI is a very handy tool for deploying serverless functions. It brings the infrastructure as code pattern to the party, making it extremely easy for any member of the team to checkout the code and start deploying a stack without having to know specific commands.
Although Serverless supports multiple cloud providers, a given serverless.yml file only targets one provider. It is very easy, however, to maintain multiple serverless.yml files, one per provider that you are targeting.
I am still new to Serverless, but I will definitely keep an eye on it for all my serverless deployments!